Saturday 29 December 2012

The Season of Giving

I hate posting this after Christmas, but I really had to since I wanted everything to be a surprise! 

So here are a few DIY gifts that I made this year...

I started with a scarf for my daycare provider, because it was the most simple. I made almost 20 of these suckers for my baby shower (but none since) and I was still pretty confident that I would be able to replicate an awesome scarf. 
Success! I had a couple bumps in the beginning, but all in all, I remembered how to fix my mistakes, so it worked out well! I also taught myself how to sew a 'P' onto a knitted piece. It didn't turn out as awesome as I would have liked, but it's still a pretty neat effect! 


Next, it was my cousin's girlfriend's gift. 
I don't know her very well, but I do know that she just had a baby and appears to love pink as much as I do, so that seemed easy enough! 
I found an awesome mug and drew my inspiration from there. I bought 3 different sized bowls, and 2 plates from Dollarama and beautified them with some Sharpies. 
There are now a bunch of different people who have posted about this and I can't find my original inspiration, but this is so easy to do! 
(Just a side note, you should use real Sharpies because I didn't, and the colors changed! Boo! One of the bowls didn't turn out at all, so I kept it!) 
But once you draw (or have your kids draw) on the dishes, stick them in the oven at 350 for about 30 minutes. Done! 
I used masking tape to section off the black lines and it worked pretty well! 
This gift fits all my favorite parts about giving a gift - personalized, easy, fast, and inexpensive! 
She thought this was the greatest thing ever! 
Phew!

My next gift, was for my cousin Emma, and I found it on Christy's blog
It's a marshmallow shooter! 
Jay got and cut all the PVC pieces and we printed the instructions 
and put it in a box. 
We had to substitute the marshmallows for wheat puffs, since the marshmallows got stuck (maybe our fancy Canadian marshmallows are bigger?).

And, I couldn't resist making this braided ball for my cousin's newborn. 
It was actually pretty easy to make. I used my knitting machine to knit the 6 strands, then braided it all together. I tried to follow the Ravelry pattern, but I found it too complicated to convert the paper strands to knit strands, so I eyeballed it. I added a baby rattle in the middle to make it a little more fun. 
I can't wait to hear updates as she grows!

All in all, it was a successful DIY Christmas! 

{Daily Odd Compliment: I like you more than I like receiving gifts. And I absolutely love getting presents. It's probably my favorite thing to do}


Tuesday 4 December 2012

D.I.Y Advent Jar

This year, 
I am omitting a chocolate advent calendar from my list.

Seriously, that's not what the holidays are about! I love spending time with my family, but I feel that more and more, commercialism is trying to take over the world and I am fighting more and more to keep it out of my house... in case you haven't noticed from my last couple of posts. 

Moving on... After Googling and Pinteresting advent calendars, I came up with a good alternative to a candy filled calendar - an advent Jar! 
I found what appears to be an old coffee jar (courtesy of an old tenant/friend) in my basement, so I used it.

First, I used my trusty mod podge to glue some holiday themed wrapping paper to the lid.

Next, I cut out some of the circular pieces and glued them randomly to one side, and cut out triangles to create a tree, on the other side.


Then, once the lid was dry, I cut the excess paper off the lid.

To finish off the jar, I hot glued a snowman ornament, that Abby made one year on her birthday, to the top.

Then, I added all the pieces of paper, each with a different activity on them.
I made some pink, for activities that can be done during the week, and some yellow, for activities that need more time and can be done on a weekend.

I know we are already a few days into December, but Abby hasn't even asked yet about a chocolate calendar, so I am pretty excited about starting this tomorrow!
Now, all we need is snow!


{Daily Odd Compliment: I miss you as much as I miss my childhood. Only, a little less than that.}

Sunday 2 December 2012

D.I.Y / Second hand Birthday Party

My baby girl has turned 6 and my Professor is almost a year old. Whoa.

It was a challenging to think of a good party that could involve both of the kids and be fun, as well as age appropriate, for both age groups. Oh, and it had to be inexpensive! My house is barely big enough to hold my own family, so I decided to do it at our community centre. They have a lot of awesome rooms to rent, but the one I picked, is one that is used for playgroups and has a few couches.

For the cake, I knew I didn't want to do two separate cakes, so I decided to do some mini cupcakes, and cupcakes inside ice cream cones (I don't think I need to tell you that I got the idea from Pinterest, but I will anyway!).
These are really cute, tasty and best of all - really easy to make! Honestly! 
I poured the batter directly into the ice cream cone, about half full, then placed them in a muffin tin, and baked them exactly like I would bake other cupcakes.
I also made Abby a personalized cookie...
...and just an X for the Professor.
And of course, I couldn't let the birthday boy go without a mini cupcake! 
I'm pretty sure he liked it!

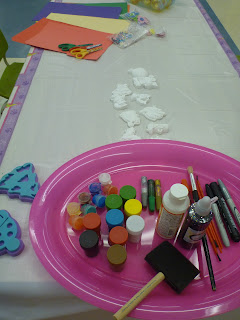
It was very important to me to have most of the birthday items be second hand, so I brought as many craft things from my stash as possible... 
I used old colorful file folders that I have laying around for people to cut out... 
I also found some crafts from Abby's 3rd birthday so I thought this was the perfect opportunity to break those babies out. Mel brought some awesome temporary tattoos that you can color in, and the kids (big and small) really enjoyed them!
Needless to say, the craft table was quite a hit! 

After browsing Pinterest for many hours, looking for birthday ideas, I came across a variety of things to do with balloons and/pictures. I knew I wanted to do something fun with some old birthday pictures, more than I wanted to incorporate balloons, so a friend and I braided some yarn, then I taped the braids between 2 pictures. 
Each picture was actually doubled sided, since I wasn't sure where they would hang and I thought it would be a neat effect that way. 
We ended up hanging them from the posts in the room.
The pictures are in order of Abby's birthdays, with the last one being The Professor. 
I think this is just the beginning for me of incorporating pictures like this into a 
birthday party! 

The gifts were awesome! Abby was thrilled with the amount of Barbie related things she got! I was pretty impressed at the Professor's ability to unwrap gifts! 
Tada!

Instead of loot bags for the kids, I decided to get each of the kids a second hand puzzle or game. My idea was for them to potentially play with them during the party, but they were having too much fun! But they all got to take one home to play with, so I think that's a win!

All in all, it was quite a success and I would recommend renting a space like this to any family who doesn't want the chaos that comes with having a 
child's birthday party in your home! 
I can hardly believe that a year ago I was at my wit's end with my pregnancy, and now I almost have a toddler..

The first year is bittersweet, but I do love birthday parties!


{Daily Odd Compliment: From now on, all my birthday wishes will be about you}


Saturday 1 December 2012

Made with Love

I couldn't decide if I should include Abby's present in with the birthday post, but I thought keeping them separate would be more fun, and I want to highlight Abby, just as I did with 
The Professor...

As a homemade gift for Abby, as I explained in my post about The Professor's present, I tried to come up with something that would be both neat, and fun for her. So, I came up with the idea of turning some of her clothes into doll clothes. I sort of went off the tracks from my original idea, but ended up with a good result anyway, so I count it as a win! 

I started off with a skirt of her's that was too small. 
(It had built in shorts, so I removed them.)
Then, I cut both sides of the skirt to remove some bulkiness and width. After I eyeballed it, I measured it against the doll and sewed it at the right width. 
Done. 
(And of course, I made her a cute little vest because I just couldn't resist!)

Then, (and this is where I went off course), I took a skirt of mine that I didn't really like, and made a skirt for Abby, and a halter dress for her doll. 
This is my skirt, which I took apart, including the elastic, and Abby's skirt.
And this is Abby's skirt with the doll's dress. 
This one was a little more complicated, but it turned out pretty cool. It's a little too tight, so I may have to make a few adjustments, but she liked it, so that's all that matters to me!

Next year, I will have to get a little fancier! 


{Daily Odd Compliment: Compared to what I would do for you, The Legend of Zelda is just child's play}

Sunday 18 November 2012

The Professor's Present

It's the end of the world! And Xavier's birthday, so I thought I would shake things up this year.

I don't normally get Abby some birthday presents, so this year, I am starting a new tradition (I have been trying to create traditions for a few years now). I am going to take something of theirs, and revive it into something else. 
To kick this off, I converted a playmat, made by my mom, into a quiet book. 
Here's how...

 This is what the blanket looked like... 
First, I took the backing off (the bottom left-hand corner shows it), then I seperated the squares into strips, which is how my mom originally sewed them...
I had my awesome Mel to help with any seam ripping and creative layout...
 We took some of the squares off of the 3 piece strips, because not all of them had something the baby can play with. These are the first pages of the book, when you open it, which I left how they were...
 For the third page, I added a few buckles and will add a few buttons to hook onto...
 For these pages, I just added a piece of ribbon from another square, with a fastner, and sewed the velcro on that was ripping off...
 This is the front (or back, but I think It should be the front) which I got Mel to fringe a collar from a modified shirt, to create and X...
And this is the back, which I left as is (and if some of you recognize it, B, it's because it's from my 2002 Prom dress :) )

All in all, this was a pretty simple project for me! I'm very lucky to have such a great semstrest as a mother because all the ground work for this was already done! As a bonus, this was a lot of fun to put together for The Professor! Hope he enjoys it!

{Daily Odd Compliment: Is heaven missing an angel? If so, I'm sure you could find it.}

Tuesday 13 November 2012

Tie into Wristlet

It's almost the end of the year again - crazyness! It means birthday party in 3 weeks and Festivus soon after!

So, now that we aren't knee deep in renovations, or scrambling to put our own house back together, I am getting into the gift making spirit! 
Here is what I did tonight... (here is where I got my inspiration)

First, I folded the tie to get an approximate idea of where I was going to sew it, then I cut off the excess.

Then, I sewed the unfinished edge of the tie...

Next, I folded the tie over, added the piece for the wristlet, and sewed it in place, to create a double pocketed wristlet... 

Buuuut.. the tie isn't wide enough, so when I sewed it, it no longer fit my phone and plastic. Oops.

Yup.

Oh well, it was practice! Off to Value Village to find wider ties! I will keep you posted!


{Daily Odd Compliment: You make me happier than when I see a well-groomed moustache. On a man, though, not a lady}

Friday 5 October 2012

It's off to work I go

'Cause I love a rainy night

Every time it rains, I think of that song.

It's my last Friday off. I can't believe it's been almost a year since I have been off work! This week has been the most productive week out of the whole year. The first 6 months were spent sleeping/crying/getting through each day. The past couple of months were much better! I really feel privileged to have had so much time off! Thank you Canadian government! 

I really want to end my mat leave with a bang, but I feel like I have already done so much that there isn't a whole lot left to do! I decided to take out my sewing machine, and here's what I ended up doing today.. 

I went to Value Village and picked up all the parts for my Jean Grey costume.
(I bought a tank top to mod, but it's a little too tight - oops!)

I cut off the sleeves of the turtleneck to make forearm pieces. I then sewed them a little tighter, since they are going over a leotard, I knew I had to make them snug. I added an elastic at the top, as well as a couple folds to more accurately portray the cartoon version. 

Since my tank top idea didn't pan out, I modified the actual shirt. I cut the front and back in a v-neck, cut the armpits a little closer, and cut some side holes to be able to see the yellow leotard better. I also sewed up both sides of this to make it snug.
And lastly, I drew an 'x' onto the superhero belt. 
I thought about doing something for my legs, but there isn't enough material left from the shirt, so I may do something duct tape-esque closer to the day. 

I also attacked the front entrance. 
I finally put up my "A" hook (peg?) that I got as a present from one of my favourite people but that I have never gotten around to putting on the wall. I wanted a place to hang my purse, so this works really well! 
 Yesterday I went out and got this metal shelf to house our winter items. The bottom basket right now holds the Rollerblade related things, but will be replaced with the hubby's and I's winter gear. The Princess and Sesame Street pails are for the kids' winter gear (and baby crocs).

All in all, it's been a pretty productive day, and week! 

{Daily Odd Compliment: So you don't have a six pack. Or a four pack. But, damn, can you wear the shit out of a sweater.}


Monday 24 September 2012

Husband Appreciation Day

I know there are a lot of jokes about husbands being slackers, but if that were always true, I think fewer of us would be married. 

And yes, I know the divorce rate is increasing, but they started off married. 


My husband has been gone for a few days now, and there are a few things I have accomplished since then, namely; I put an adhesive strip around the tub to seal it, I did all of our laundry, and I managed to attend the last half of church after having seen my parents do their half marathon. 
To be honest, I get a lot of stuff done normally, but I like to do even more when my husband is gone because I have less distractions, and I want to keep myself busy. 

I realise that this is sounding a little conceited, and that's not really the point - so I will get to the point. I used to not miss him as much when he went to Israel, or Belize, but now, I just want him to stay here. All the time. For some reason, while he's gone, the Brita water container is always empty, and the dog keeps bugging me to get let out. Weird. 

All this to say, I have a pretty great husband. High five to all of us smart enough to know how to pick 'em! 


{Daily Odd Compliment: 
You know in Home Alone 2 when the homeless lady in the park throws bird seeds at Harry and Marv, and they're like "No, not birdseed! This is bothersome!" That's so resourceful. That's like something you would do.}

Thursday 20 September 2012

Genius fix

One of my pet peeves is to organise something and then have a family member disregard my awesomeness.

I have recently realised, however, that maybe it's not their fault. I need to find better storage and organisation solutions. I am ALWAYS on the lookout for new ways to reuse or improve something! This may be my first post about specific organisational ways that improve my family life, but rest assured, it won't be the last! 
Here are my most recent 'ah ha' finds...

I know I can sometimes be a little picky, but I am especially picky about my towels. Who wants to use the same towel as their husband? I'm sure people do, and that's fine... but not for me! If I am ever unsure as to whose towel is hanging, I wash it - it's not worth the risk! What if I use a certain part of the towel to dry off my face?! Gross. 
Anyway, here is what I have come up with - clothespins with our names on it so we know which towel belongs on whose body! 
I am pretty proud of myself because I actually didn't steal this from Pinterest!

{ Side note (pun intended): I came up with this idea in the shower a few months ago, but because I had nowhere to write it down, I forgot about it as soon as I stepped out of the shower. My husband mocked teased me when I saw this shower note pad, but I really want one! A lot! }

This next one, however, is a modification of the tension rod under sink, which I did take from Pinterest. 
 The Professor currently doesn't have a closet because the closet space in this house was thought up by a bunch of nudists. Most of his clothes fit into his wardrobe, but there are still some pieces that I want to hang. So, I put a tension rod between the wardrobe and the wall - tada! I guess it's not the most original thing around, but hey - it works!

The last thing, really isn't that spectacular, but more practical. 
This bookcase is hiding (sorta) our billions of TV related cords. I put all the movies that were on the bottom shelf into a basket. I am just starting to get into hardcore babyproofing, so this is one of those things. Now, when The Professor is up and about, I can simply lift the basket onto the table and it's out of his reach. To the left of the bookcase, which isn't super obvious, but I wedged a mirror in between the wall and the bookcase to keep him away from the wires, and who doesn't love looking into a mirror?!

That's it for now! If you have some genius storage tips - please share! 

{Daily Odd Compliment: You're like Britney Spears before she married Kevin Federline. I don't think I need to explain myself any further.}

Monday 17 September 2012

DIY Bridal Shower

This is my first time being a Maid of Honor, and definitely my first time organising a bridal shower! 
I tried to make as much as possible, to make it both affordable and personalised...

I started off with a theme... that was the easy part!
 Organising!
I asked all guests to keep that in mind when thinking of a gift.
I bought a few containers, and reused a few I already had, as Mel's gifts.
I had a wonderful vision of the sun shinning on the rooftop... red and purple balloons floating around... and the best cake ever...

I was pretty close! The sun shone for most of it. Once the rain started, we moved inside and had some yummy cake!


This is what the everything looked like...

I bought the green storage bin to house boxes of crayons I collected from the guests, for Wedding decorations. The storage bin and shower curtain I used as a table cloth, adhere to Mel's bathroom theme. I also got all the guests to sign the shower curtain with sweet words and advice so that Mel can be reminded how much we love her the next time she takes a shower. 
The frame and the purple striped box, I made. 
I went to bulk barn and got candy to fill 4 jars as prizes. I also made sure to get enough candy to use for the party favours. 
I also bought a set of 3 pink shallow dividers to house the utensils at the party, which match Mel's bathroom colours. 
Here's a little more detail...
 First, I roughly cut a rectangular piece of material, using the frame as a guide. Then, cut 2 smaller pieces and placed them in a diagonal. I folded the seams twice over, then ironed them (mostly to avoid changing out the thread in my sewing machine... and I would have had to iron it anyway... that's my logic).
 Next, I placed the 3 pieces together again, laid the cardboard into the frame, and cut the edges of the fabric more closely (that's the pile of scraps you see).
 Voila!

 I put markers in this pretty desk organiser at the party, which we used for the games. 

 Next, I made a cute little box, which Mel says she will be using for mail...
 I took a box of tissues, wrapped it with a pretty bag I had, and hot glued it into place. I left the handle because I thought it was neat and possibly useful.

That was pretty much it! It was a small group, so I didn't need a whole lot. 

Thanks for stopping by! As always, I hope you can draw inspiration and make fun things for your next party!


{Daily Odd Compliment: You're the cutest thing since animals decided to stop growing and started jumping into teacups. Which, I know, is a pretty recently phenomenon, but it is so darn cute.}